Decadent Cocoa Coffee Bars: A Perfect Blend of Chocolate and Coffee
Savor the delight of my Decadent Cocoa Coffee Bars with Rich Cocoa Flavor. Easy to bake, these treats are perfect for coffee lovers. Try the recipe now!

look into into Deliciousness: Why You’ll Love These Coffee Bars
Picture this: it's a chilly sunday morning. you’ve just brewed a fresh pot of coffee, and as the aroma wafts through the house, you find yourself craving something sweet to go with it.
What do you do? skip the store-bought cookies and bake coffee bars with rich cocoa flavor . trust me, they’re like a warm hug in dessert form! honestly, there's nothing better than digging into these decadent cocoa coffee bars while sipping on your favorite brew.
Pure bliss.
A Classic Twist: The Story Behind Cocoa Coffee Bars
These bars have a rich history that dates back to classic dessert bars that have been enjoyed for generations. imagine people gathering around a table with freshly baked treats, sharing stories and laughter.
Fast forward to today, and these bars remain a staple at coffee shops and home kitchens. they’re perfect for the modern coffee lover, seamlessly merging rich chocolate with that unbeatable coffee kick.
As for time? you’ll need about 45 minutes total, with 15 minutes of prep and 30 minutes in the oven.
The best part? they aren’t too complex. this recipe is marked as medium difficulty—just a bit of mixing and measuring, and you'll be a bar-baking pro in no time.
Money-wise, these bars are budget-friendly. most ingredients are probably already in your pantry. in terms of yield, you’ll whip up 12 delicious bars , just enough to share or keep as your personal stash.
Why These Bars are the Ultimate Sweet Pick-Me-Up
Let’s talk about the good stuff: the health benefits and unique flavors of these cocoa coffee bars. the combination of cocoa and coffee isn’t just a delicious pairing; it can actually pack a nutritious punch.
Both ingredients are rich in antioxidants, making these bars a guilt-free indulgence. plus, they’re chock-full of flavor that’ll satisfy your sweet tooth without the heaviness of some other desserts.
They're perfect for any occasion, whether it's a weekend brunch, a mid-week pick-me-up, or even a cozy movie night with friends.
Unlike heavy pastries or complicated cakes, these bars are easy to make and super shareable. you can enjoy them on their own, top them with a scoop of vanilla ice cream, or pair them with whipped cream and a drizzle of chocolate sauce.
Seriously, the possibilities are endless.
And let’s be honest, who doesn’t love a good chocolate and coffee pairing? they complement each other beautifully, making these bars a notable among similar recipes like fudgy coffee brownies.
Plus, they’re a compelling alternative to classic chocolate coffee snacks, bringing a new twist to your baking repertoire.
Ready to Bake?
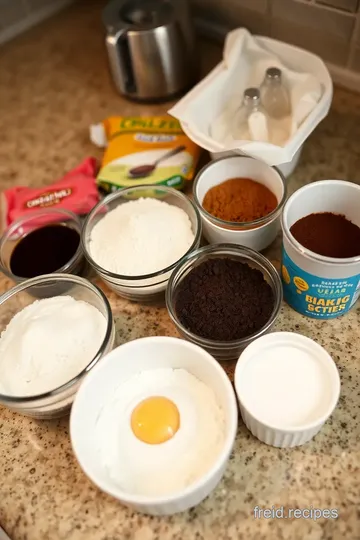
Now that you’re as excited as i am about baking these bars, let's smooth the path to the ingredients you’ll need.
Grab your cocoa powder , fresh coffee, and some basic pantry staples. get ready to whirl in the delights of baking and create that dreamy fusion of flavors.
You’re in for a treat!
Essential Ingredients Guide
Baking is an art, and knowing your essential ingredients is like having the right colors on your palette. whether you're whipping up a classic chocolate coffee snack or diving headfirst into something like bake coffee bars with rich cocoa flavor , understanding what goes into your treat makes all the difference.
Let’s break it down, shall we?
Premium Core Components
First things first, let’s talk premium core components . Here’s a handy list you’ll want to keep close by.
-
Measurements: Stick with 1 cup (120g) of all-purpose flour or 1/2 cup (40g) of unsweetened cocoa powder. If you're measuring in metric, that’s 120g and 40g , respectively.
-
Quality indicators: look for cocoa that’s rich and dark; the packaging usually has a nice sheen. freshness matters here. always buy freshly ground beans or premium-quality coffee for that great aroma and flavor.
-
Storage guidelines: keep dry ingredients in airtight containers. this keeps them fresh and ready when you’re set to bake. cocoa powder is best stored in a cool, dark place where it can last up to two years.
-
Freshness Tips: When selecting your ingredients, check expiration dates. Fresh eggs—room temperature, of course—can make or break your baking, you know?
Signature Seasoning Blend
Now, you can't forget about the signature seasoning blends !
-
Essential Spice Combinations: A little dash of cinnamon or nutmeg can take your cocoa bars to the next level. These spices pair beautifully with chocolate.
-
Herb Selections: If you’re feeling adventurous, consider some mint or even a hint of rosemary for more unusual flavor combinations. Trust me, it’s delicious!
-
Aromatics: Coffee lovers , your secret weapon is a pinch of espresso powder mixed in the batter. It amplifies that chocolate and coffee pairing like nothing else.
-
Regional Variations: Think about switching up the vanilla extract with almond or even hazelnut for that unique flair if you find yourself needing a twist during baking season .
Smart Substitutions
Sometimes, life throws you curveballs; that’s when smart substitutions come into play.
-
Common Alternatives: No cocoa powder? Try melted dark chocolate. Run out of flour? Almond or coconut flour will work.
-
Dietary Modifications: For a dairy-free option, coconut oil can replace butter. You can even seamlessly switch eggs for flaxseed meal if you’re looking to bake vegan-style!
-
Emergency Replacements: Forgotten the sugar? Honey or maple syrup works in a pinch. Just remember to adjust the liquid ratios slightly.
-
Seasonal Options: In fall, swap in pumpkin spice for your chocolate bar recipe, and come summer, some fresh berries can give a delightful twist.
Kitchen Equipment Essentials
Alright, friend, let’s not forget your kitchen equipment essentials .
-
Must-Have Tools: You’ll want a 9x9-inch (23x23 cm) baking pan—perfect for those fudgy coffee brownies. A good mixing bowl and a whisk are life-savers too.
-
Alternative Equipment Options: If you don’t have a whisk, a fork will do. And no baking pan? Use a muffin tin for some cute mini coffee-infused dessert bars.
-
Preparation Tips: Remember to preheat your oven to 350° F ( 175° C) before diving in! Your batter needs that warmth to fluff up just right.
-
Storage Solutions: Invest in some good-quality airtight containers. They keep those easy cocoa bars fresher for longer—if they last that long in your house!
As tempting as it is to dive straight into those rich cocoa desserts, knowing your ingredients and tools can save you from some serious baking blunders (who hasn't burnt a batch or two?).
I can practically smell those coffee-infused dessert bars already!
Let’s get ready to master the art of baking with the full recipe for these decadent bars that i just can’t get enough of.
They’re basically my sweet pick-me-up on a gloomy monday! so strap on your apron and gather your ingredients; it’s time to create!
Mastering the Art of Professional Baking: Cocoa Coffee Bars Edition
When it comes to baking, you know it’s all about that sweet alchemy between ingredients. today, we’re diving into the world of decadent cocoa coffee bars .
Trust me, if you love the combo of rich chocolate and that buzz from coffee, you’re in for a real treat.
These bars are not just any dessert; they're a total game-changer for coffee lovers!
Essential Preparation Steps
Before we jump into mixing and baking, let’s talk preparation. This is where the magic begins!
Mise en place: this fancy term means "everything in its place,” and it's crucial. measure out your 1 cup of flour and ½ cup of cocoa powder beforehand.
I learned this the hard way when i was halfway through mixing batter and realized i forgot to measure my sugar.
Time management tips: set a timer for each step. for example, after you start to bake - let's say 25- 30 minutes at 350° f ( 175° c) , set a timer.
This will help you avoid overbaking and get that gooey fudge texture!
Organization strategies: lay out your ingredients in the order you’ll need them. it keeps things flowing smoothly. honestly, i can’t tell you how many times i’ve rummaged through cabinets looking for baking soda at the last minute.
Safety Considerations: Don’t forget about safety! Always use oven mitts when handling hot pans, and be cautious when working with sharp tools. A little precaution goes a long way in the kitchen.
Step-by-Step Process
Ready to dive in? Let’s break it down step by step, so you can easily follow along and whip these up!
- Preheat the Oven: Fire it up to 350° F ( 175° C) . You want it nice and hot when you get those bars in there!
- Mix Dry Ingredients: In a bowl, combine 1 cup of flour, ½ cup of cocoa powder, 1 tsp of baking powder , and ½ tsp of salt . Whisk it like you mean it!
- Cream Butter and Sugar: In another bowl, cream ½ cup of softened butter and 1 cup of granulated sugar until fluffy. It should look pale and airy, like clouds.
- Add Eggs and Vanilla: Toss in 2 eggs and 1 tsp of vanilla extract . Mix, mix, mix until combined.
- Incorporate Coffee: Gradually mix in ½ cup of brewed coffee . This is where the magic happens – coffee elevates these from just chocolate bars to something truly special.
- Combine and Spread: Fold the dry ingredients into the wet mix until just combined. Overmixing is the enemy here, so be gentle! Spread the batter evenly in a greased 9x9-inch baking pan .
- Bake: Slide it into the oven for 25- 30 minutes . When a toothpick comes out mostly clean, they are ready!
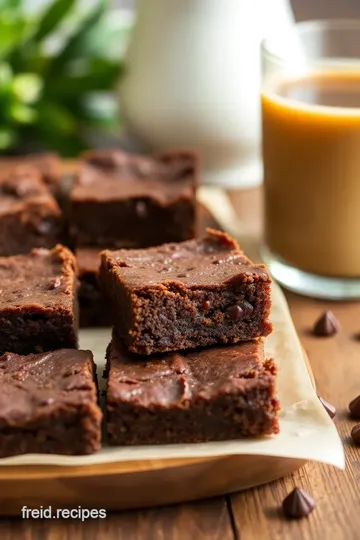
- Add Toppings: Sprinkle ½ cup of chocolate chips on top right after baking. Let them melt and spread the joy!
- Cool and Slice: Cool in the pan before lifting out to slice into squares. A dusting of powdered sugar adds an extra touch of charm.
Expert Techniques
Alright, let’s up our baking game with some expert tips!
-
Quality Checkpoints: Always taste-test your coffee beforehand. A strong brew will give these bars the kick they need. Use a coffee that pairs well with chocolate – trust me; it makes a world of difference!
-
Temperature Control Points: Keep an eye on the oven. If you notice the edges start to darken too much, drop the temp a tad. Nobody likes dry, overcooked bars!
-
Timing Precision: Check your bars a few minutes before the end of the baking time. You want them fudgy, not cakey!
-
Troubleshooting Tips: If they do overbake, add a scoop of ice cream on top when serving. Easy solution for a minor mishap!
Success Strategies
To hit the sweet spot with your baking, here are some pro tips to ensure success.
-
Common mistakes to avoid: don’t skip the preheating step! going in with a cold oven can throw your texture off.
Also, using cold eggs straight from the fridge can mess you up. always aim for room temp!
-
Quality Assurance Tips: If you’re unsure about doneness, trust your instincts and check with a toothpick early.
-
Perfect Results Guide: If you like thinner bars, use a larger pan. Want them thicker? Stick to a smaller pan. It’s all about personal preference!
-
Make-Ahead Options: These cocoa coffee bars store well. You can whip them up a day before your coffee gathering, and they’ll be just as delicious!
And there you have it! you're now ready to bake coffee bars with rich cocoa flavor that will satisfy any craving.
Whether it's a pick-me-up for your afternoon slump or a sweet treat for guests, these bars are bound to impress.
Additional Information
If you want more dessert bar ideas or need variations, just let me know! Happy baking, friends!
Extra Tips for Baking Delicious Cocoa Coffee Bars
If there’s one thing i love more than baking, it’s sharing some pro tips to elevate those delicious treats. so, let’s dive into some juicy insights on how to bake coffee bars with rich cocoa flavor that’ll dazzle your friends and keep them coming back for more.
Pro Tips & Secrets
Think of me as that helpful friend who knows a few shortcuts! one of my best secrets is to use freshly brewed coffee .
It not only enhances the flavor but gives you that kick to fuel your day! and, if you’re pressed for time, you can always whip up the batter in just 15 minutes .
Just remember to keep an eye on those baking times—nobody wants the fudgy goodness to turn into dry coffee rocks!
Another handy tip? don’t skip the cooling time! let those cocoa coffee bars chill in the pan—this helps them firm up, and you’ll get cleaner cuts.
Trust me, nothing worse than a crumbly mess when you slice those beauties!
Perfect Presentation
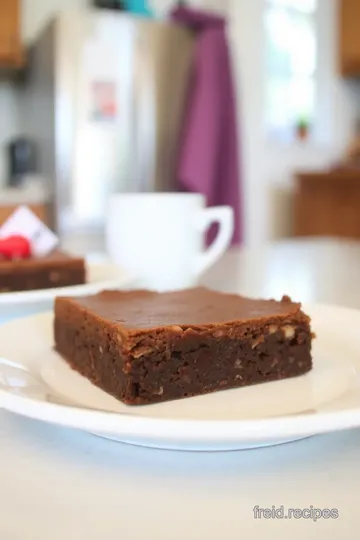
Now, let's talk about presentation . you want these bars to look as good as they taste. to plate them up like a pro, consider using a square plate and stacking two bars at a slight angle.
For that wow factor, top them with a light dusting of powdered sugar and maybe a few chocolate chips on the side.
It’s all about creating that visual appeal .
Garnish with fresh mint leaves or some colorful berries for that pop of color. You see, people eat with their eyes first, so make it count!
Storage & Make-Ahead
One of the coolest things about these bars? they keep so well! once they’re fully cooled, pop them in an airtight container.
They will stay fresh for about 4-5 days on your kitchen counter. want to be extra smart? you can also freeze them—simply wrap each bar in plastic wrap, then slip them into a zip-lock bag.
Whenever you need a quick pick-me-up, just thaw one for a couple of hours.
Reheating is a cinch, too! Just toss a bar in the microwave for about 10-15 seconds , and you’ll enjoy that warm, gooey goodness again!
Creative Variations
Let’s face it; the world of coffee-infused dessert bars is a playground of flavors! love a little spice? toss in cinnamon or even nutmeg for a seasonal kick.
Have a nut allergy? use gluten-free flour and leave out those nuts—no need to miss out on the fun!
Not a fan of cocoa powder? you can always swap it out for {high-quality dark chocolate} instead, though it will change the texture.
Don’t shy away from being adventurous. perhaps a hazelnut chocolate swirl across the top? yes, please!
Complete Nutrition Guide
Nutritionally, these bars weigh in around 200 calories each, with a good balance of carbs, protein, and fat. However, if you’re counting calories, consider cutting them smaller, so you can enjoy a few bites without the guilt!
And hey, coffee lovers—these bars bring not just sweetness, but also a good dose of antioxidants! When you think about it, they could kinda be classified as healthier chocolate treats , right?
Closing Thoughts
So there you go! you’re now armed with tips and tricks to nail the best cocoa coffee bar recipe out there.
They’re perfect for impressing guests or simply treating yourself to a sweet pick-me-up. remember, baking is not just about following a recipe—it's about experimenting and having fun in the kitchen! enjoy that delightful combination of rich cocoa and coffee, and happy baking!
Frequently Asked Questions
How can I make my Bake Coffee Bars with Rich Cocoa Flavor even more decadent?
You can elevate your Bake Coffee Bars with Rich Cocoa Flavor by adding toppings like chopped nuts, a layer of caramel sauce, or even a drizzle of chocolate. Additionally, serving them warm with a scoop of vanilla ice cream will create a delicious dessert experience!
Can I substitute ingredients in the Bake Coffee Bars with Rich Cocoa Flavor recipe?
Absolutely! You can substitute gluten-free flour for all-purpose flour to make them gluten-free. Brown sugar can replace granulated sugar for a deeper flavor, and you might even try using espresso powder to enhance the coffee taste.
What is the best way to store leftover Bake Coffee Bars with Rich Cocoa Flavor?
Store any leftover Bake Coffee Bars in an airtight container at room temperature for up to 3 days. If you want to keep them longer, consider refrigerating them for up to a week or freezing them for up to 3 months. Just ensure to wrap them tightly before freezing.
Can I use decaf coffee in the Bake Coffee Bars with Rich Cocoa Flavor recipe?
Yes, you can use decaf coffee if you prefer to limit your caffeine intake! The flavor profile will remain delicious, and your Bake Coffee Bars will retain their rich cocoa taste without the extra caffeine punch.
How do I ensure my Bake Coffee Bars with Rich Cocoa Flavor stay fudgy?
To achieve a fudgy texture, be careful not to overmix your batter after adding the dry ingredients, and check for doneness a few minutes before the minimum baking time. A toothpick inserted should come out with a few moist crumbs, indicating the center is still soft and fudgy.
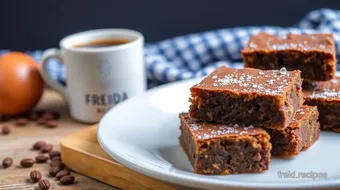
What are some great serving suggestions for Bake Coffee Bars with Rich Cocoa Flavor?
These bars pair wonderfully with a cappuccino or cold brew coffee to complement the flavors. You can also serve them warm with whipped cream, a dollop of ice cream, or drizzled with caramel sauce for a rich dessert!
Decadent Cocoa Coffee Bars: A Perfect Blend of Chocolate and Coffee Card
⚖️ Ingredients:
- 1 cup (120g) all-purpose flour
- 1/2 cup (40g) unsweetened cocoa powder
- 1 tsp baking powder
- 1/2 tsp salt
- 1/2 cup (115g) unsalted butter, softened
- 1 cup (200g) granulated sugar
- 2 large eggs, at room temperature
- 1 tsp vanilla extract
- 1/2 cup (120ml) brewed coffee, cooled
- 1/2 cup (90g) semi-sweet chocolate chips
- 1/4 cup (30g) powdered sugar (optional, for dusting)
🥄 Instructions:
- Step 1: Preheat the oven to 350°F (175°C) and grease or line the baking pan with parchment paper.
- Step 2: In a bowl, whisk together the flour, cocoa powder, baking powder, and salt. Set aside.
- Step 3: In a separate mixing bowl, cream the softened butter and granulated sugar until light and fluffy.
- Step 4: Beat in the eggs one at a time, followed by the vanilla extract, mixing until well combined.
- Step 5: Gradually mix in the cooled brewed coffee until fully incorporated.
- Step 6: Gently fold the dry ingredients into the wet mixture until just combined (do not overmix).
- Step 7: Spread the batter evenly in the prepared baking pan.
- Step 8: Bake in the preheated oven for 25-30 minutes or until a toothpick inserted into the center comes out mostly clean.
- Step 9: Immediately after baking, sprinkle chocolate chips on top and let them melt slightly before spreading evenly.
- Step 10: Allow the bars to cool in the pan, then lift out and slice into squares. Dust with powdered sugar if desired.
Previous Recipe: Easy & Juicy Pan-Seared Black Cod with Miso Glaze: A Family Favorite Recipe
Next Recipe: Easy Cheesy Bake Chicken Pasta with Creamy Spinach Goodness: A Family Favorite