Delightful Bake Salad Cookies
Discover my delightful Bake Salad Cookies: A Fun, Unique Treat! Sweet meets savory in this easy recipe. Perfect for family fun or parties—try it today!

A Deliciously Whimsical Adventure
Have you ever found yourself standing in the kitchen wondering, “what can i create that’ll knock everyone’s socks off?” well, grab your apron because i’m about to introduce you to the world of bake salad cookies: a fun, unique treat .
Imagine cookies that giggle with flavor, combining the sweet and savory happiness of your favorite salad. it sounds wild, right? but honestly, it’s a delightful experience everyone should try at least once!
These little beauties originated as a playful twist in the cookie universe, where traditional sweetness meets the freshness of salad ingredients.
If you've ever enjoyed a crunchy salad topped with nuts and dried fruits, you’ll appreciate how these flavors spin together in cookie form.
Bake salad cookies aren’t just a passing fad—they’re gaining the spotlight at parties and cozy family gatherings. there’s just something about popping one of these gems into your mouth that makes you think, "wow, this is different!"
A Baking Journey That's Easy and Fun
Now, let’s break down what’s involved in making these fun homemade cookies with cheese . it takes about 30 minutes total— 15 minutes of prep time and 12- 15 minutes in the oven.
For the bakers out there, you’ll find this medium-difficulty recipe approachable, even if you're not a pro in the kitchen.
It yields about 24 cookies, making it perfect for sharing (or maybe just a bit of cookie hoarding).
Speaking of costs, ingredients like butter, flour, and nuts won’t break the bank. you can whip up a batch without feeling like you just paid for a gourmet cookie boutique treat.
Plus, these sweet treat alternatives are way more fun when you make them yourself!
Why You'll Love Bake Salad Cookies
You might wonder, “what’s so special about these cookies?” well, how about the fact that they pack a health punch along with flavor? with nuts offering healthy fats and dried fruits providing natural sweetness, it's kind of like sneaking in good-for-you bites among the desserts.
Every cookie is a mix of hefty crunches and soft bites—a creative baking idea that kids and adults will adore.
These cookies are also an excellent choice for various occasions—from casual family dinners to festive get-togethers. they shine as party dessert ideas or bake-off treats that will surely get people talking.
By embracing the unexpected combination of flavors, you’re serving up more than just cookies; you’re displaying confectionery creativity !
And let's talk about cookie variations! this recipe is like a blank canvas. want a little more sweetness? toss in chocolate chips ! prefer a mediterranean vibe? swap out dried fruits for sun-dried tomatoes.
With a bit of imagination, the options are endless!
Make Your Own Crunchy Innovations
As someone who loves experimenting in the kitchen, i can tell you that when it comes to comfort food recipes, having fun is so essential.
If you’re looking to add a twist to your usual cookie game, these savory snacks are the way to go.
Plus, they offer a different texture—think crunchy surprises around every corner!
Whether you’re looking for kid-friendly cooking projects or a whimsical treat that’ll brighten your afternoon, Bake Salad Cookies have got you covered. Who knew baking could be this enjoyable?
As we gear up to dive into the specifics of the ingredient list, just remember: baking doesn't have to be a science, it can be an art! Get ready to grab your mixing bowls because we’re about to get creative with these delicious cookie combinations !
Let’s explore the fun ingredients that will bring these cookies to life!
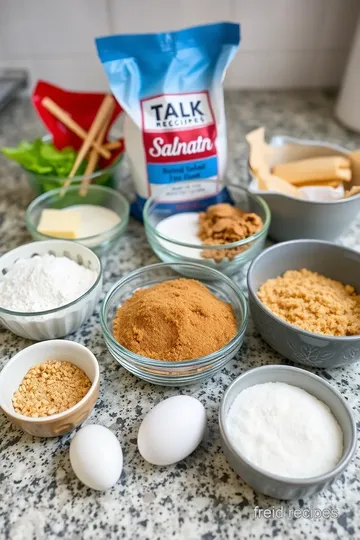
Your Go-To Essential Ingredients Guide
Hey there, cookie aficionados! we're diving into the essential ingredients guide that’ll take your baking game to new heights and help you whip up some fabulous treats, like those bake salad cookies: a fun, unique treat .
Let’s talk about the premium core components that'll be your best buddies in the kitchen.
Premium Core Components
When you’re grabbing ingredients, you want to know what you’re working with. Here’s the scoop:
-
Measurements: If you’re using cups, make sure you’re actually Leveling them off. In metric, 2 ½ cups of flour is about 312 grams . It's a game-changer!
-
Quality Indicators: Look for bright colors in your herbs; they should smell fresh. Trust me, that dried parsley that’s been sitting around forever? It’s pretty lifeless—better hit the store!
-
Storage guidelines: keep your flour in a cool, dry place. did you know that it can last up to 1 year when stored properly? resealable bags work wonders for keeping your pantry organized.
-
Freshness Tips: Always feel your ingredients. Fresh herbs should be crisp and fragrant , while nuts should snap with a nice crunch. If they smell off, toss 'em!
Signature Seasoning Blend
Getting your signature flavor takes some experimenting. Here’s where the creative baking ideas come in:
-
Essential Spice Combos: Cinnamon and nutmeg for that warm, cozy feel, or cumin and paprika for a savory punch. Start small, and taste as you go.
-
Herb Selections: You can’t go wrong with thyme and rosemary—they can jazz up your cookies, believe it or not. Trust your palate!
-
Flavor Enhancers: Consider things like vanilla extract or almond extract. They elevate your cookie variations to another level.
-
Regional Alternatives: Ever thought about using taco seasoning in a sweet treat ? Sounds wild, but some folks swear by it for fun baking recipes!
Smart Substitutions
Let’s face it. Sometimes you just don’t have everything on hand. Here’s how to adapt:
-
Common Alternatives: No buttermilk? Just mix some milk with a tablespoon of vinegar and voilà!
-
Dietary Modifications: For healthy cookie options , swap sugar for applesauce in some recipes. You’d be surprised how moist that makes your cookies.
-
Emergency Replacements: Short on eggs? A half banana or ¼ cup of applesauce can save the day in most recipes!
-
Seasonal Options: Summer berries or autumn spices? Customize your cookies to reflect what's fresh and in season.
Kitchen Equipment Essentials
Before you get your bake on, grab these must-haves:
-
Must-Have Tools: Don’t skimp on a good mixing bowl. Also, a trusty cookie scoop helps get perfectly-sized cookies every time.
-
Alternative Equipment Options: If you don’t have a stand mixer, a handheld one will do! You just need some elbow grease.
-
Preparation Tips: Always line your baking sheets with parchment paper. It saves cleanup time and keeps your cookies from sticking.
-
Storage Solutions: Rethink how you store your cookies. An airtight container keeps them fresh longer, but toss a slice of bread in there for soft cookies.
Let’s keep that cookie fun going with those whimsical recipes that blend sweet and savory. the bake salad cookies are calling your name! can’t wait for you to bring that mix of flavors into your kitchen.
Grab your ingredients and let’s dive into the tasty details!
Getting Ready for the Bake
You’re all set! with these ingredients and some tips handy, you’ll conquer the world of cookies, one tray at a time.
Get your ovens preheated, and let's jump into those step-by-step instructions to create something totally unique. trust me, you and your friends will be blown away by those bake salad cookies and all the sweet treat alternatives you’ll come up with!
Bake Salad Cookies: A Fun, Unique Treat
Hey there, cookie lovers! let's talk about something that’ll spice up your baking game: bake salad cookies . these aren’t your grandma’s cookies.
Nope! we’re talking about a wild mix of sweet and savory, giving boring cookie recipes a kick in the pants.
Picture this: crunchy nuts, creamy cheese, and a pop of dried fruit, all wrapped up in one delicious package. perfect for a party or just a cozy sunday baking session!
Essential Preparation Steps
Before we dive into the actual baking, let’s chat about the prep work. You know it’s key to good results, right?
Mise En Place Fun
“mise en place” sounds fancy, but it just means having everything ready to go before you start. measure out your 2 ½ cups of all-purpose flour and all those nifty add-ins.
Trust me, this step saves a ton of time. it’s like setting up a game before the big match.
Time Management Tips
Since we want these cookies baked and on the table fast, keep an eye on the clock. you’ll need about 15 minutes to prep and 12- 15 minutes to bake.
That's a cookie magic interval right there!
Organization Strategies
Is your kitchen a magical mess? no worries! having bowls for your wet and dry ingredients set up in advance keeps things smooth.
Bonus points if you have everything lined up like a smug little army.
Safety Considerations
Ah, my dear friends, remember: hot ovens are no joke! use oven mitts. make sure those baking sheets are not too hot when you grab ‘em.
Safety first so we can keep the fun vibes rolling!
Step-by-Step Process
Now, let’s get down to the nitty-gritty.
- Preheat your oven to 350° F ( 175° C) .
- In a mixing bowl, whisk together your dry ingredients: flour, 1 tsp baking soda, 1 tsp baking powder , and ½ tsp salt .
- Cream together 1 cup of softened unsalted butter, 1 cup brown sugar , and ½ cup granulated sugar until it's fluffy like a cloud.
- Toss in 2 large eggs and 1 tsp vanilla extract . Mix it all up until it’s combined.
- Gradually add in those dry ingredients. Be gentle! You want to keep it tender, just like your favorite cozy blanket.
- Fold in the good stuff: ½ cup shredded mozzarella, ½ cup chopped nuts, and ½ cup dried cranberries . Don’t be shy; give it a good mix!
- Drop spoonfuls onto your baking sheets. Make sure there’s some room between them - they need their space!
- Bake them for 12- 15 minutes , keeping an eye out for those lovely golden edges.
- Let ‘em cool on the sheets for 5 minutes before you steal them away to a wire rack. Patience, my friend!
Expert Techniques
Want to impress your friends? Here’s where we elevate the flavor game.
Professional Methods and Quality Checkpoints
Make sure your butter is softened! It makes for a better texture. Also, use a cookie scoop to get uniform sizes. No one likes the cookie lottery!
Critical Steps Explained and Troubleshooting Tips
A common mistake? Overmixing after adding your dry ingredients. It’s a sneaky little trap that leads to tough cookies. We want soft, tender bites of happiness!
Success Strategies
So, now you’ve made these fab cookies, what’s next?
Common Mistakes to Avoid
Don’t skimp on the cooling time. This is crucial for those flavors to meld. You could try different mix-ins like chocolate chips or even sun-dried tomatoes for a Mediterranean twist.
Quality Assurance Tips
Taste a little dough before baking (just be careful with the eggs!) to ensure it's sweet enough for your liking. After all, your cookies should be nothing short of magical.
Perfect Results Guide
Keep an eye on your timing. For even better results, rotate your baking sheets halfway through. It’s like doing a little cookie dance!
Make-Ahead Options
These cookies can be made in advance! You can freeze the dough logs. Just slice and bake whenever you get that sweet tooth craving or surprise guests. It’s that easy!
So there you have it! these bake salad cookies are sure to be the talk of the town, combining unique cookie recipes and fun baking ideas into one charming treat.
Whether you’re whipping them up for a family night or a bake-off challenge, you’re bound to impress!
Stay tuned for Additional Information and more delicious cookie combinations, like how to switch things up with herbs in baking or even homemade cookies with cheese to add a whimsical touch to your cookie game! Keep it real, and happy baking!
Discovering the Secrets of Bake Salad Cookies: A Fun, Unique Treat
Let’s dive into the whimsical world of bake salad cookies . yeah, you heard that right! we’re blending sweet with savory and having a blast doing it.
These aren’t just any cookie recipes; these are funky cookie combinations that’ll surprise your taste buds. trust me; you'll want to whip these up for your next house party or cozy baking session with the kiddos!
Pro Tips & Secrets
Here’s the deal. time-saving techniques matter, especially when you’re juggling life like a circus performer! prepping your ingredients ahead of time can seriously speed things up.
I like to do all my measuring and chopping while i sip on my coffee. it makes the process feel way more relaxed.
Now, onto flavor enhancement tips . for a little extra zing, try adding a splash of lemon juice to your dough.
Seriously! it takes those sweet and savory flavors up a notch. and take it from me, the look of surprise on people’s faces when they taste that bit of cheese in the cookies is priceless!
For the presentation advice , don’t go all fancy-schmancy! a simple, rustic look is what we're going for. place those cookies on a colorful platter, maybe sprinkle a bit of freshly chopped herbs on top for a pop of color.
Everyone eats with their eyes first, right?
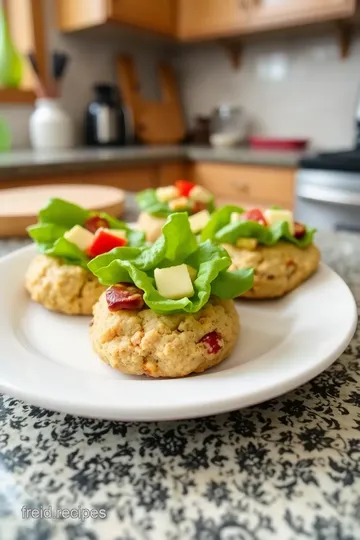
Perfect Presentation
Now, onto plating techniques . if you’re serving these bake salad cookies at a party, stack ‘em high! nothing says “i’m the fun friend” quite like a towering stack of cookies.
Think of it like a cookie mountain, and you’re the playful guide leading your friends to cookie nirvana.
Garnish ideas? how about a few edible flowers? they can make everything look picture-perfect! and don’t forget about those color combinations .
The golden-brown cookies, mixed with vibrant green herbs and maybe red cranberries, create a visual feast. simply lovely!
Storage & Make-Ahead
Okay, let’s talk storage guidelines . these cookies can last a cool week if you store them in an airtight container.
Just make sure they’re completely cooled before you tuck them away. you can even pop them in the freezer! just flash freeze them for a couple of hours, then transfer to a resealable bag.
As for reheating instructions , when you're ready to devour them again, toss them in the oven at 350° F for about 5- 7 minutes. They’ll come out warm and gooey!
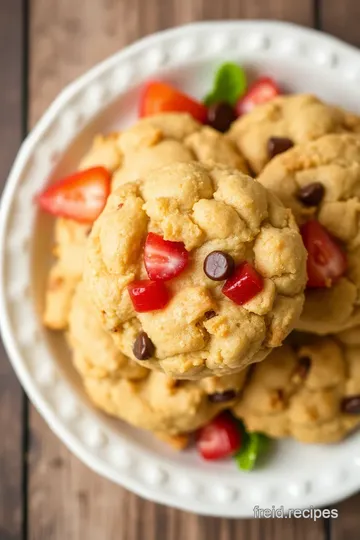
Creative Variations
Feeling fancy? time to explore creative variations ! you can add chocolate chips for a twist that’ll have everyone asking for the recipe.
Or perhaps you’re feeling adventurous? swap out the dried fruit for spicy jalapeños and get those savory snacks excited!
Don't forget to consider dietary modifications . for the gluten-free pals, a gluten-free flour blend works like a charm here! you can even test out seasonal twists .
Think pumpkin-spice in the fall or citrus zest in the summer. the world of gourmet cookies is at your fingertips!
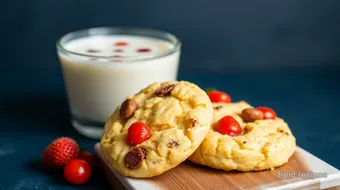
Complete Nutrition Guide
Now, for the health-conscious folks among us, let’s break down the nutrition of these cookies. each one has about 150 calories.
Major win! they pack a little protein and fiber too, which is great because let’s be real: cookies can be comfort food, but they can also be part of a balanced diet.
Keep in mind, if you’re serving these at a gathering, let folks know about any dietary considerations upfront. Nobody likes to bite into a cookie to find out it has nuts when they’re allergic!
Wrap It Up with a Bow
So, there you have it! bake salad cookies: a fun, unique treat that’s not only easy to whip up but also a conversation starter.
Whether you're looking for fun baking recipes or aiming to impress with some whimsical desserts , these cookies are your ticket.
Bake them, share them, and most importantly, enjoy them! your friends and family will appreciate the creativity and love that goes into each crunchy, savory-sweet bite, making you the star of any bake-off.
Happy baking, y'all!
Frequently Asked Questions
What are Bake Salad Cookies: A Fun, Unique Treat made of?
Bake Salad Cookies are a creative blend of traditional cookie ingredients and savory salad elements. The cookies feature a deliciously sweet dough made with butter, sugars, and eggs, combined with shredded mozzarella cheese, nuts, and dried fruits, making them both unique and delightful.
How can I modify my Bake Salad Cookies for dietary restrictions?
For gluten-free options, simply swap the all-purpose flour with a gluten-free flour blend. You can also make nut-free cookies by substituting walnuts with sunflower seeds or omitting them altogether, and replacing mozzarella with feta cheese can provide a tangier flavor.
What are some practical tips for making the best Bake Salad Cookies?
Ensure your butter is softened prior to mixing for a smoother dough. Be careful not to overmix after adding the dry ingredients to maintain a tender texture. Use a cookie scoop for consistent cookie sizes which will help them bake evenly.
How should I store leftover Bake Salad Cookies?
Store your Bake Salad Cookies in an airtight container at room temperature for up to a week. For longer storage, you can freeze the cookies; just make sure to layer them with parchment paper to prevent sticking, and they will last for up to three months in the freezer.
Can I add other ingredients to my Bake Salad Cookies?
Absolutely! Feel free to experiment with mix-ins such as chocolate chips for added sweetness, or you can swap dried cranberries for sun-dried tomatoes for a Mediterranean twist. Just keep the overall volume of mix-ins similar to ensure even baking.
What is the nutritional information for Bake Salad Cookies?
Each cookie contains approximately 150 calories, with 2g of protein, 8g of fat, and 20g of carbohydrates. They also have about 1g of fiber and 7g of sugar. Adjusting ingredients based on dietary needs may change the nutritional values slightly.
Delightful Bake Salad Cookies Card
⚖️ Ingredients:
- 2 ½ cups (312g) all-purpose flour
- 1 tsp baking soda
- 1 tsp baking powder
- ½ tsp salt
- 1 cup (226g) unsalted butter, softened
- 1 cup (200g) brown sugar, packed
- ½ cup (100g) granulated sugar
- 2 large eggs
- 1 tsp vanilla extract
- ½ cup (60g) shredded mozzarella cheese
- ½ cup (75g) chopped walnuts or pecans
- ½ cup (75g) dried cranberries or raisins
- ¼ cup (15g) chopped fresh parsley or basil (optional)
🥄 Instructions:
- Step 1: Preheat the oven to 350°F (175°C).
- Step 2: In a mixing bowl, whisk together flour, baking soda, baking powder, and salt.
- Step 3: In another bowl, cream together butter, brown sugar, and granulated sugar until fluffy.
- Step 4: Add eggs and vanilla; mix until well combined.
- Step 5: Gradually add the dry ingredients to the wet mixture; mix until just combined.
- Step 6: Gently fold in mozzarella cheese, nuts, dried cranberries, and fresh herbs.
- Step 7: Drop spoonfuls of dough onto prepared baking sheets, spacing them apart.
- Step 8: Bake for 12-15 minutes, or until cookies are golden brown around the edges.
- Step 9: Allow to cool on baking sheets for 5 minutes before transferring to wire racks.
Previous Recipe: My Secret to Quick Homemade Burger Sauce with a Twist: Easy & Flavorful!
Next Recipe: Savoring Fideo Soup: Hearty Veggie Delight - A Cozy Family Favorite