Crunchy Gluten-Free Saltine Crackers
Ever craved gluten free saltine crackers? Here's my easy recipe for crunchy, homemade crackers that pair perfectly with dips and soups. Let's bake!

- Free at Last: Gluten-Free Saltine Crackers
- A Delicious look into Into History
- What’s in It for You?
- Baking Your Way to Cracker Heaven
- Your Essential Ingredients Guide for Deliciousness
- Crafting Crunchy Gluten-Free Saltine Crackers
- Additional Recipe Information for Crunchy Gluten-Free Saltine Crackers
- Recipe Card
Free at Last: Gluten-Free Saltine Crackers
Oh my gosh, i remember the first time i tried to make gluten-free saltine crackers . being gluten-free myself, i missed those little crispy wonders from my childhood.
You know those moments when you're feeling snacky, and all you want is to dip something crunchy into your favorite hummus or creamy soup? that’s where these bad boys come in! trust me; these crackers are like a hug in snack form.
They’re simple to whip up and, if you mess up, no worries—you’ll learn for next time.
A Delicious look into Into History
So, let’s take a quick ride down memory lane. saltine crackers have been a staple in american households since the late 1800s.
They were originally created as a light snack, perfect for dunking in soup or enjoying with cheese. fast forward to today, and they’re still rocking parties and picnics! the twist? we’re giving this classic a gluten-free makeover! with more folks avoiding gluten these days, these homemade saltine crackers have found a whole new crowd.
The best part? making these at home is a breeze! in just about an hour , including chill time, you can have your own batch ready to go.
Seriously! and the difficulty level? let’s just say it’s an easy cracker recipe that anyone—yes, even complete kitchen novices—can nail.
What’s in It for You?
Now, let’s break it down a bit. first off, these crunchy delights are not just tasty; they come with health benefits too! using a gluten-free flour blend means you’re avoiding nasty gluten for your tummy while still enjoying something flavorful.
Plus, you get to control what goes into your snacks, leading to healthier choices overall. say goodbye to preservatives and fillers in those store-bought versions!
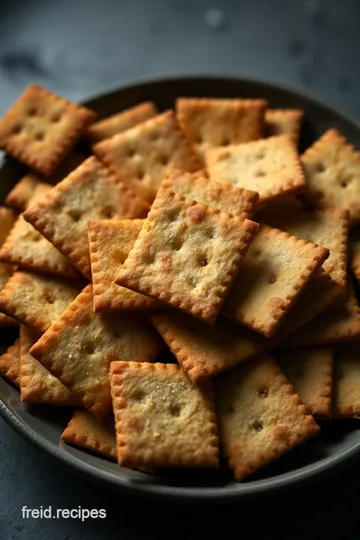
Besides, these crackers are incredibly versatile snack foods . use them as gluten-free appetizers with some cheese or dip, toss them in a soup for that crunchy texture, or just munch on them plain.
They’re thin and crispy, which means they work for just about any occasion—from game day gatherings to cozy, intimate dinners.
Here’s a fun fact: did you know that snacks can actually help you feel fuller for longer? that’s right! keep it at hand for those late-night cravings or afternoon dips when you need a quick pick-me-up.
They’re not just for kids or for parties; these can be your go-to comfort snacks too!
Baking Your Way to Cracker Heaven
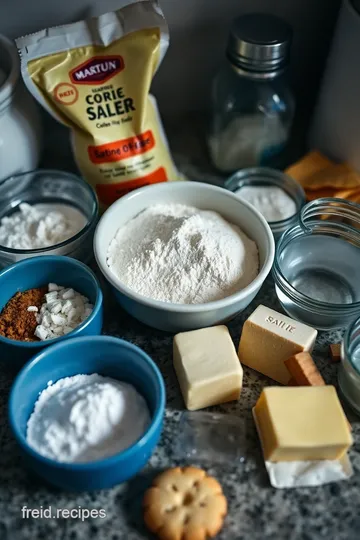
Jumping into the recipe, it’s super important to gather your ingredients first. trust me; things go way smoother that way.
You’ll need some basic stuff like gluten-free all-purpose flour , a little salt, and the star player— unsalted butter . have all that? perfect!
And don’t you dare skip the chilling step. it’ll make sure your crackers are ultra-crispy. you can even spice things up by adding your own twist with some garlic powder or herbs.
Y’all know i can’t resist a little flavor!
As you pull those golden, crunchy beauties from the oven, the smell wafting through the kitchen is pure magic . it’s like inviting friends over for a party with no food—everyone expects a feast and you’re showing up with low gluten snacks that impress.
Who wouldn’t love these at a get-together? they’re perfect for dipping into salsa or guacamole—i’m drooling just thinking about it.
So now that I’ve got your mouth watering and your mind racing with ideas, let’s get into the nitty-gritty. Start cooking! Who knows? You might just create your new favorite snack.
Ready to gather your goodies and tackle this thin crackers recipe together? Let’s dive into the ingredients. You’re gonna love making these yummy gluten-free snacks as much as I do!
Your Essential Ingredients Guide for Deliciousness
Let’s talk about the backbone of good cooking - those premium core components ! getting to know your ingredients can seriously change your cooking game.
No kidding. i remember the first time i thought, “what’s the deal with salt? can’t i just sprinkle any old thing?” oh, past me was so naive! let’s dive into the essentials!
Premium Core Components
So, detailed measurements are super important. whether you're measuring in cups or grams, accuracy matters! for instance, using 1 cup of flour can vary wildly depending on how you pack it.
Try to weigh out 120g for a more consistent result.
What about quality indicators ? when you’re shopping, look for vibrant colors and fresh scents. spices should smell bold and fabulous, not like they’ve been sitting in your pantry since the last decade.
And don’t get me started on herbs – some should be tender and bright green.
Storage guidelines are equally key. your beautifully fresh herbs will wilt if left in the moisture of the fridge. did you know you can store them in a glass of water just like flowers? talk about a shelf life extender! also, those gluten-free flour blends can hang out for up to six months in a cool, dry place.
Just make sure to seal that bag tight!
When shopping, always have a little checklist for freshness tips . choose veggies that feel firm, spices that are fragrant, and flour that doesn’t have those pesky lumps.
Once you start doing this, your cooking will flow like honey – sticky and sweet, but smooth!
Spice It Up – Signature Seasoning Blend
Let’s get personal! i consider spices to be like flavor superheroes. think of them as the secret agents of your cooking squad.
A pinch of cayenne for heat, a sprinkle of thyme for earthiness. and don’t forget the essentials – salt and pepper.
These guys are your basic, but trust me, they’re the backbone of many a dish.
When mixing your herb selections and pairings, try blending parsley and dill for that savory kick, or oregano and basil for an italian treat.
Oh! and for that extra pop, flavor enhancers like garlic or onion powder work wonders.
Depending on where you’re cooking, you can add some regional flair. think about adding cumin and coriander if you’re feeling a mexican feast.
We can always swap things up based on what you’ve got in the pantry.
Smart Substitutions
Now, let’s address the elephant in the room – not every ingredient always gets along. so, if you’re suddenly out of an ingredient, fear not! i’ve got your back with common alternatives .
In a pinch, you can use greek yogurt instead of sour cream for a tangy twist. or if you’re mixing up those easy cracker recipes , try applesauce as a sugar substitute!
How about some dietary modifications ? Need to skip the dairy? Almond milk works great in most recipes, giving a nutty flavor without the lactose. Trust me, the gluten-free snacks are endless!
And don’t sweat it if you run out of something crucial! if a recipe calls for something like buttermilk, a quick fix is just milk and lemon juice.
Voila! you’ve got a quick snack recipe that’s bursting with flavor!
Gear Up – Kitchen Equipment Essentials
Alright, folks, let's talk must-have tools . if you’re serious about diving into cooking, a few essential pieces are total game-changers.
A trusty rolling pin will transform your dough into that perfect thin crackers recipe! you also need some good mixing bowls and a baking sheet .
Trust me, you want your gluten-free crackers evenly baked, and nothing gets in the way of crispy snacks like an uneven pan.
Now, if you’re like me, you’ll want alternatives, like using a wine bottle as a rolling pin. Hey, no judgment here!
Prep Like a Pro!
To make things smoother while whipping up those savory snacks , prep all your ingredients before you start. this way, you can focus on the magic unfolding in front of you instead of running around like a crazy person looking for that one spice.
Getting Ready for the Next Step
Now that we’ve got the essentials down, it’s time to jump into the fun part: whipping up those crispy gluten-free saltine crackers .
Stick with me, and soon you’ll be munching away on yummy gluten-free snacks everyone will love.
Crafting Crunchy Gluten-Free Saltine Crackers
If you’re on a gluten-free diet , cravings for crunchy snacks can hit hard, right? i mean, who doesn’t love munching on crispy crackers while watching netflix or having a cozy dinner? so, let’s talk about an easy cracker recipe that’ll blow your taste buds away: crunchy gluten-free saltine crackers ! with this savory snack in hand, you’ll be the star of any snack party (or just your couch!).
Essential Preparation Steps
Before jumping into the oven, let's get our ducks in a row. first up is mise en place , which is just a fancy way of saying you should gather all your ingredients and tools.
For these saltines, you’ll need some gluten-free flour blend , sea salt, baking soda, melted butter, and a few fun spices if you're feeling adventurous.
Now, timing is everything! for this recipe, you'll have 15 minutes of prep time , plus a chill period of 30 minutes before baking.
Make sure you have a plan so you’re not scrambling at the oven. organize your space to avoid any last-minute cooking chaos!
Oh, and don't forget safety! Keep your area clean, and be aware of any allergy considerations, especially if you’re bringing these to a gathering.
Step-by-Step Process
Ready to roll? Here’s how you make these little bites of heaven:
- Make the Dough : Combine 1 cup of gluten-free flour, 1/4 teaspoon salt, 1/4 teaspoon baking soda, and optional spices in a bowl. Pour in 1/4 cup melted butter and 1/4 cup water , and mix until a dough forms.
- Chill the Dough : Wrap it in plastic wrap and pop it in the fridge for 30 minutes . This helps the flavors meld and makes it easier to roll out later.
- Roll It Out : Preheat your oven to 350° F ( 175° C) . Sprinkle some flour on your counter and roll that dough out between two sheets of parchment paper until it’s about 1/8 inch thick .
- Cut the Crackers : Use a pizza cutter or knife to slice it into squares. Transfer those beauties to a baking sheet lined with parchment paper.
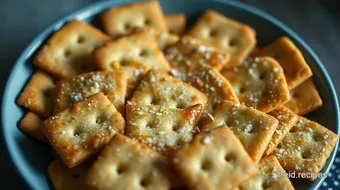
- Top with Salt : Brush with water or melted butter, then sprinkle with some coarse sea salt.
- Bake : Time for the oven! Bake your crackers for 12- 15 minutes or until they turn golden and crispy. Don’t walk away—keep an eye on them halfway through to check for even browning.
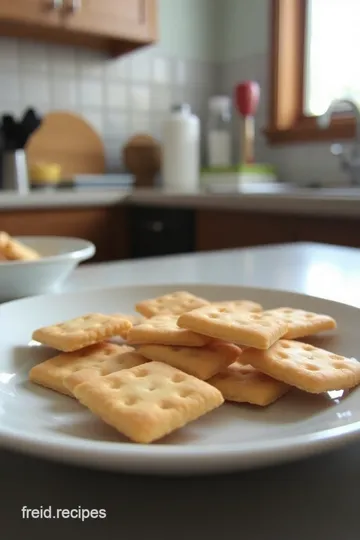
- Cool and Enjoy : Let them cool completely on a wire rack. You can feel good about snacking when you’ve made these from scratch!
Expert Techniques
Baking can be a tad tricky, but I’ve got your back. Here are some tips for gluten-free baking :
- Quality Check : Ensure your gluten-free flour has xanthan gum. It does wonders for texture.
- Avoid Mistakes : Don’t skip the cooling part, or you’ll end up with chewy crackers instead of the perfect crunch.
- Troubleshooting : If your dough seems crumbly, you can add tiny bits of water. Just be careful not to overdo it!
Success Strategies
Let’s talk about some pitfalls to dodge while crafting these low gluten snacks . a common blunder is rolling the dough too thick, which will lead to a soft cracker instead of that sought-after crunch.
If they’re burning, it could be the temperature is a tad too high. adjust as needed!
If you want to make-ahead options, these crackers store well in an airtight container for about a week. Perfect for grabbing a quick snack while you binge-watch your favorite shows!
Final Thoughts: Additional Information
So there you have it, kind snack ensoiasts! these homemade saltine crackers are not just for those avoiding gluten. they’re a versatile snack food everyone can enjoy.
Serve them with dips, top them with cheese, or munch them solo!
These crackers are a fun addition to your gluten-free appetizers lineup and also make for delightful party snack recipes. You can even customize them by adding spices like onion powder or paprika—how creative can you get?
It’s time to ditch those pre-packaged snacks and dive into the world of gluten-free comfort snacks with this quick cracker recipe. Happy baking!
Additional Recipe Information for Crunchy Gluten-Free Saltine Crackers
When it comes to baking gluten-free saltine crackers , there’s definitely more to it than just mixing ingredients. let’s dive into some pro tips, tasty variations, and storage secrets to elevate your cracker game.
Oh, and buckle up—these aren't just any crackers; they’re crunchy gluten-free snacks that everyone can enjoy!
Pro Tips & Secrets
Personal insights:
baking with gluten-free flour can feel a little tricky at first. trust me; i’ve been there! my top advice? always use a gluten-free all-purpose flour blend that contains xanthan gum.
It helps mimic gluten’s stretchy goodness.
Time-saving techniques:
got limited time? (who doesn’t?!) prep your dough ahead of time! i often whip up a batch and keep it in the fridge for those “i need a snack now” moments.
Chill for about 30 minutes, and you’re golden!
Flavor enhance tips:
want to jazz things up? toss a bit of garlic powder or a sprinkle of rosemary into the dough.
Seriously, it’s a game-changer. you’ll never look at crackers the same way again!
Presentation advice:
crackers can tumble into the boring zone if you’re not careful. after baking, arrange them on a charming platter.
Maybe add some colorful dips or spreads; it’ll scream, “look at me!” trust me, your friends will be impressed.
Perfect Presentation
Plating Techniques:
Stacking those crackers up in a cute pile can really catch the eye.
Garnish Ideas:
A sprinkle of fresh herbs or chili flakes on top not only adds interest but makes your dish pop visually.
Color Combinations:
Pair your savory snacks with vibrant dips—think red salsa, bright guacamole, or a rich green pesto. It's a feast for the eyes, making your gluten-free appetizers more enticing.
Visual Appeal Tips:
Lighting is key. Natural light will gift your crackers a delightful glow, perfect for those Insta snaps, ya know?
Storage & Make-Ahead
Storage Guidelines:
Keep your crunchy gluten-free snacks fresh by storing them in a tight container once cooled. They’re best eaten within a week, but good luck making them last that long!
Preservation Methods:
For long-term storage, consider freezing them. Pop them in a baggy, and they’ll stay delicious for up to three months.
Reheating Instructions:
Want to bring back that crispy goodness? Throw them in a hot oven for a few minutes. It works like magic!
Freshness Duration:
Ideally, for the best crunch, try to enjoy them within a few days. They can get a little soft after a week, but thankfully, they’re still tasty!
Creative Variations
Flavor Adaptations:
Feeling adventurous? Swap the sea salt topping for everything bagel seasoning . Yes, please!
Dietary Modifications:
Want a vegan version? Just replace that melted butter with olive oil or coconut oil, and you’ve got yourself a dairy-free cracker delight.
Seasonal Twists:
Around the holidays, I love adding cinnamon and sugar for a sweet version! Perfect with tea!
Regional Variations:
Why not try some regional flair? Incorporate spices like Cajun seasoning or even taco seasoning for a fun twist at your next party!
Complete Nutrition Guide
Detailed breakdown:
for each of these delightful crackers, you’re looking at approximately 120 calories with just 1g of protein and 7g of fat per serving.
They might be light, but they pack a crunch!
Health Benefits:
Gluten-free doesn’t mean sacrificing nutrition. These crackers can be a good source of fiber if you choose the right flour blend.
Dietary Considerations:
Make sure to read labels; some gluten-free products aren’t created alike!
Portion Guidance:
Enjoy them solo or pair with dips. A serving of four should tide you over as a satisfying snack!
Expert FAQ Solutions
Common Questions:
Is it really easy to make gluten-free saltines? Yes! If you can measure, mix, and roll, you’re good to go.
Troubleshooting Guide:
Crackers not crunchy enough? You might not have rolled them thin enough. Next time, get that rolling pin working!
Success Tips:
Always keep an eye on them while baking. You want golden and crispy, not burnt!
Variations Explained:
If you ever wonder what makes a cracker “gluten-free,” it’s all about those alternative flours. Experiment until you find your favorite blend!
So, grab your mixing bowl, and gear up for some delicious baking! these homemade saltine crackers are not just snacks; they’re versatile, slightly addicting, and perfect for sharing—or not! whether you’re dipping them, enjoying them solo, or placing them on a party platter, they’re sure to please everyone—even those who are skeptics about gluten-free alternatives .
You might just find your new go-to snack recipe, and honestly? that’s a win in my book! happy baking, friends!
Crunchy Gluten-Free Saltine Crackers Card
⚖️ Ingredients:
- 1 cup (120g) gluten-free all-purpose flour blend
- 1/4 teaspoon salt
- 1/4 teaspoon baking soda
- 1/4 teaspoon garlic powder (optional)
- 1/4 cup (60ml) unsalted butter, melted
- 1/4 cup (60ml) water
- 1 tablespoon coarse sea salt
🥄 Instructions:
- Step 1: In a mixing bowl, combine gluten-free flour, salt, baking soda, and garlic powder (if using).
- Step 2: Add melted butter and water. Mix until a dough forms.
- Step 3: Wrap the dough in plastic wrap and chill for 30 minutes.
- Step 4: Preheat the oven to 350°F (175°C).
- Step 5: Roll out the chilled dough between two sheets of parchment paper until 1/8 inch thick.
- Step 6: Use a pizza cutter or knife to cut into squares or rectangles.
- Step 7: Transfer to a baking sheet lined with parchment paper.
- Step 8: Brush the tops with water (or melted butter) and sprinkle with coarse sea salt.
- Step 9: Bake for 12-15 minutes or until golden and crispy. Check for even browning halfway through.
- Step 10: Allow to cool completely on a wire rack before enjoying or storing.
Previous Recipe: Delicious Gluten and Dairy Free Breakfast: 5 Fluffy Sweet Potato Pancakes!
Next Recipe: How to Make Delicious Canyon Gluten Free Bread: A Kitchen-Tested Recipe