Ethereal Gluten-Free Rice Pilaf
Wondering if rice pilaf is gluten-free? This easy, comforting recipe embraces aromatic spices and fresh veggies for a delicious family favorite!

Ready to Explore Rice Pilaf?
Oh my gosh, have you ever walked into a house where a pot of something warm and comforting is bubbling on the stove? that moment when the aroma hits you is like a warm hug from the inside out! speaking of warm and comforting, let's dive into gluten-free rice pilaf .
It's one of those dishes that just feels good to make and even better to eat.
Picture this: you're setting the table for a cozy family dinner, and you want something that’ll impress without taking all day to prepare.
Rice pilaf fits the bill perfectly! this dish boasts a rich history, stemming from various culinary traditions worldwide. it's like a passport for your taste buds without leaving your kitchen! yum, right?
The Lowdown on Rice Pilaf
Now, let’s break it down. rice pilaf’s journey started ages ago, likely in the middle east or central asia. fast forward to today, it's a go-to in many kitchens, especially when you need a quick side dish.
And seriously, who doesn't love a dish that can jazz up any meal?
Time requirements : you’re looking at about 10 minutes to prep and 25 minutes to cook—that's a total of 35 minutes .
Talk about a quick rice pilaf ! plus, it’s super easy—if you can sauté and simmer, you can nail this recipe.
Cost considerations : money-wise, rice pilaf is a win. a bit of rice, some broth, and veggies here and there? you’ll be out just a few bucks to serve 4 to 6 people.
It's an awesome way to create healthy pilaf recipes without breaking the bank.
Why Rice Pilaf Rocks
Let’s chat about the perks. first off, this aromatic rice pilaf is gluten-free, making it a fantastic option for those watching their gluten intake.
If you're seeking gluten-free side dishes that also pack a flavor punch, this one’s for you!
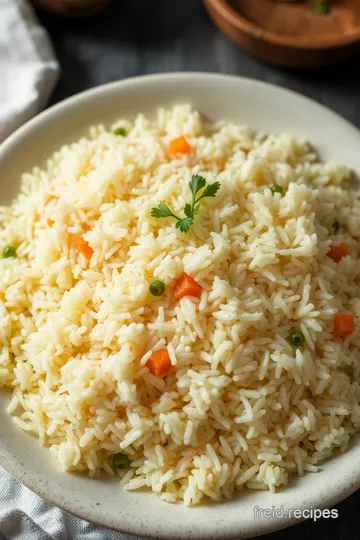
Nutritionally, rice pilaf is no slouch. it’s got carbs for energy and when you toss in some veggies like carrots and peas, boom—you've got a nutrient-rich pilaf ! it adds a bit of beta-carotene and fiber too.
If you've got picky eaters, this is a sneaky way to up their veggie intake, and honestly, who doesn’t want that?
Plus, when it comes to special occasions or just a weekday meal, rice pilaf is versatile. you can dress it up for a dinner party with fancy spices or keep it simple for a chill night in.
Pair it with grilled chicken, or even just a light salad. it’s an easy family meal that brings everyone together.
And let’s not forget all the rice pilaf variations you can explore. want a mediterranean vibe? toss in some olives and feta.
Feeling spicy? add a splash of curry powder, and you've got an exciting flavored rice dish .
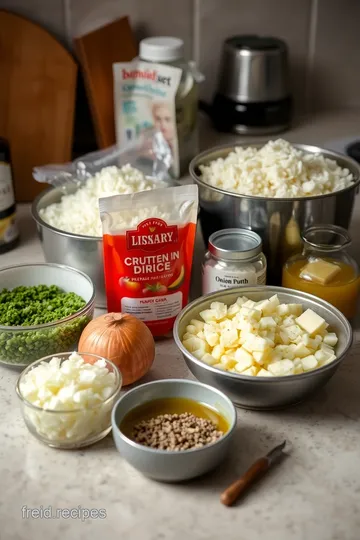
Ingredients You’ll Need
So, are you ready to whip up rice pilaf? in just a moment, we’ll get into what you need to make this comfort food magic.
But first, think about all those delightful combinations. whether you’re keeping it classic or turning it up a notch with spices and veggies, rice pilaf has your back.
As we dive into the ingredient list, keep in mind that you can swap and play around with a few things.
No long-grain rice? quinoa can jump in—another great gluten-free grain ! the world of cooking is your oyster, and this pilaf is just the beginning.
So, are you excited? let’s get cooking!
Your Go-To Guide for Essential Ingredients in Cooking
So, you're ready to whip up something delicious, huh? whether you're diving into gluten-free recipes or exploring rice pilaf variations , having the right ingredients and tools can make all the difference.
I’ve been there, trusting my instincts in the kitchen and sometimes finding myself in a pickle! let’s chat about some essentials you’ll want to keep in your pantry and how to use them.
Premium Core Components
First off, let’s talk premium core components . it’s not just about having stuff in your kitchen; it’s about having quality stuff.
Measurements are key, so whether you're in ounces or grams, just know that 1 cup (190g) of long-grain rice is a game-changer.
When picking your ingredients, look for those quality indicators —fresh herbs, vibrant spices, you know what i'm talking about.
And yeah, don’t forget about storage guidelines ! most spices should be kept in a cool, dark place; they can get funky in the heat.
For rice, keep it sealed to maintain freshness—white rice can last up to 4-5 years if you treat it right.
And just a spot of advice: if you’re unsure about something being fresh, trust your nose!
Signature Seasoning Blend
Let’s spice things up with some essential seasoning blends . you can’t go wrong with a few key spices like cumin, turmeric, and black pepper.
These are the backbone of so many flavored rice dishes . personally, i have a signature spice blend i use on everything from roasted veggies to grilled chicken.
Oh, and don’t sleep on fresh herbs like parsley or cilantro; they brighten up any dish!
You might want to experiment too. for instance, if i’m making mediterranean rice dishes , i love pairing mint with lemon zest.
Yum! or if you're craving something hearty, throw in some garlic. those flavor enhancers can take a dish from drab to fab!
Smart Substitutions
Now, let's face it: sometimes you just don’t have the exact ingredient in hand. that’s where smart substitutions come into play.
If you’re out of quinoa or brown rice, no biggie! swap it with whatever gluten-free grain you have lurking in your pantry.
Honestly, life’s too short to stress about exact ingredients.
And if you discover at the last minute that you don’t have gluten-free broth? just grab some water and add extra spices.
Sometimes those improvisations lead to the best dishes! keep a list of your common alternatives handy, especially if you love cooking for friends and family with different dietary needs.
Kitchen Equipment Essentials
Are you ready for the kitchen equipment essentials ? you don't need a fancy cheffy setup to whip up great meals.
A medium saucepan and a good wooden spoon are among my must-haves. and let’s not neglect the cutting board—trust me, you want a sturdy one.
Sometimes a little hack is all it takes. don’t have a fancy rice cooker? no problem! you can make quick rice pilaf on the stovetop just as easily.
Speaking of which, don’t forget to keep your tools clean and well-organized, or you’ll waste time sorting through a messy drawer.
Wrapping Up
There you have it! These essentials make cooking more accessible and enjoyable. Next, we’re diving into the famous question— is rice pilaf gluten free? Spoiler alert: Yes, gluten-free grains like rice are perfect for this dish!
Trust me; once you get your ingredients and tools lined up, crafting a dish like ethereal gluten-free rice pilaf will be a breeze.
And there’s nothing quite like being able to serve up a delicious side dish that everyone can enjoy. so grab your measuring cups, fire up that stove, and let’s get to those cooking instructions! you won’t regret it.
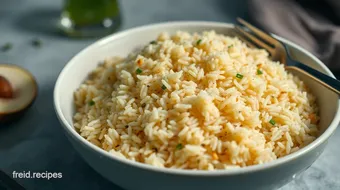
Mastering the Art of Rice Pilaf: A Gluten-Free Delight
Oh my gosh, let’s talk rice pilaf! this isn’t just any rice dish, folks—this is an aromatic rice pilaf that brings a touch of luxury to your table without any gluten.
Seriously, if you're like me, finding gluten-free recipes that don’t skimp on flavor can be a bit of a challenge.
But when it comes to this pilaf, you’re in for a treat!
Essential Preparation Steps
First things first, let's get our ducks in a row. mise en place is key here. that fancy french term? it just means “everything in its place.
” grab your ingredients— 1 cup of long-grain white rice or basmati rice , 2 cups of gluten-free broth , and your veggies.
Having everything prepped means you can cook without the stress!
Now, time management is super important. you don’t want to have your veggies sautéed and be waiting forever for your rice to cook.
So, line it up! start with a hot pan and while that’s heating, chop your ingredients. multitasking is your best friend!
Safety tip: Always use a cutting board and be careful with those sharp knives. You want your pilaf to be tasty, not a trip to the emergency room!
Step-by-Step Process
Alright, let’s dive in with some easy, numbered instructions that’ll make you feel like a pro!
-
Sauté vegetables : heat 2 tablespoons of olive oil in a medium saucepan over medium heat. toss in your finely chopped onion—sauté it until it’s translucent, about 3- 4 minutes .
Add 2 cloves of minced garlic and 1 diced carrot . cook this mix for another 2- 3 minutes .
Oh man, your kitchen is going to smell heavenly!
-
Add rice and spices : time to get that rice in there! add your rice to the pot and stir it until it’s all nice and coated with oil.
For about a minute, let it sauté. sprinkle in 1 teaspoon salt , 1/2 teaspoon black pepper , 1/2 teaspoon ground cumin , and 1/2 teaspoon turmeric for a lovely color.
-
Pour in broth : now, pour in your 2 cups of gluten-free broth and crank up the heat until it’s boiling.
Once it’s gone full boil, reduce the heat to low and cover it. let it simmer for 15- 18 minutes until the rice is tender and all that liquid is absorbed.
-
Fluff and finish : after that time, take it off the heat but let it sit covered for another 5 minutes .
When it’s time, fluff that rice with a fork and stir in 1/2 cup of frozen peas , if you’re feeling fancy!
Expert Techniques
Here’s where the magic happens—let’s get into some professional methods to elevate your pilaf.
-
Rinse the Rice : Don’t skip this step! Rinsing your rice under cold water helps get rid of excess starch, which means fluffier rice.
-
Boost the Flavor : If you’ve got a few extra minutes, toast the rice in the oil for a couple of minutes before adding broth. It ups the nuttiness!
-
Let It Be : Resist the urge to lift that lid during cooking. It helps retain the steam needed to cook the rice perfectly.
Success Strategies
Now, I gotta tell you—the journey to perfect pilaf isn’t without its bumps. Here’s how to avoid common pitfalls:
-
Don’t Rush : If you’re tempted to cook that rice faster, please don’t! Time it out—the 15- 18 minutes is vital for the best texture.
-
Quality Check : Always taste your rice towards the end to ensure it’s cooked just right. Add more salt if needed!
-
Make-ahead options : this pilaf is great for meal prep. cook it, cool it, and stash it in the fridge for up to a week.
Just reheat it with a splash of broth when you’re ready to eat.
So, do you see how incredibly versatile this dish is? with options for sautéed vegetable rice or even using quinoa for a healthier pilaf recipe , you can’t go wrong.
Plus, it pairs perfectly as a side dish with grilled chicken or even as a centerpiece for a vegetarian meal!
If you’re wondering, “is rice pilaf gluten-free?”—the answer is a big yes! this comforting gluten-free meal checks all the right boxes.
One bite of this comforting rice-expy and you'll never look at rice the same way again.
Additional Information
This rice pilaf is not just delicious, it’s also packed with nutrients. Enhance your culinary game with flavored rice dishes , and step up your side dish selection with ease! For more info on how to play around with this recipe or add your own variations, stay tuned!
Unlocking the Secrets of Gluten-Free Rice Pilaf
Hey there, fellow food lovers! so, you want to know how to elevate your ethereal gluten-free rice pilaf to the next level? let’s dive into some juicy tips and tricks that can make your rice dish not just good, but downright incredible.
Pro Tips & Secrets
Okay, let’s get real. the secret to a killer rice pilaf is all in the prep and the flavor. first off, rinse your rice! it sounds basic, but seriously, rinsing removes that excess starch.
This will help give your pilaf that fluffy texture we all crave.
Want to save time? grab a quick rice pilaf recipe that lets you toast the rice first. just a minute or two in the heat makes a big difference and brings out a nuttier flavor.
Honestly, you’ll be amazed at how a little toasting can transform your dish.
Also, don’t overlook seasoning! Add a pinch of ground cumin or turmeric for an aromatic rice pilaf that’s bursting with flavor.
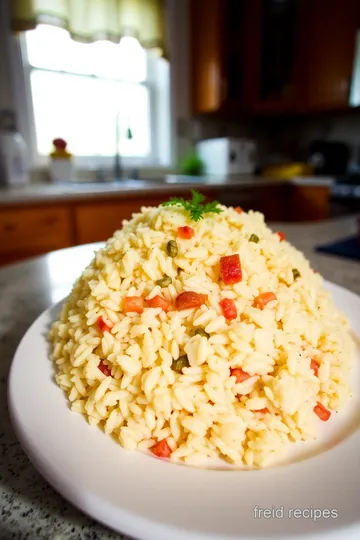
Perfect Presentation
Now that we have the flavors down, let’s talk presentation! People eat with their eyes first, right? So here's how to make your pilaf look just as good as it tastes:
Plating techniques are key! use a ring mold for a neat circle of rice. then, sprinkle some chopped fresh parsley on top for that pop of color.
If you throw on some roasted nuts for crunch, you’ve got a dish that’s as pleasing to the eye as it is to the palate!
Consider garnishing with some roasted veggies or even a slice of lemon for a zesty kick. color combinations matter, folks! think about contrasting colors like vibrant peas or bright carrots to really make your fragrant rice side dish sing.
Storage & Make-Ahead
Planning on making this gluten-free masterpiece in advance? awesome call! here’s how to ensure it stays fresh. store your pilaf in an airtight container.
It’ll keep well in the fridge for about three to four days . if you want to preserve its warmth, freeze it.
Just thaw it overnight in the fridge before reheating.
To reheat, pop it in the microwave or on a stove over low heat, adding a little broth or water to revive its texture.
Trust me, it’s a game changer for easy family meals when you don’t feel like cooking after a long day.
Creative Variations
The great thing about rice pilaf is its versatility! want to jazz it up? toss in some sautéed vegetables like zucchini or bell peppers.
Feeling adventurous? use spices like saffron for a mediterranean twist or add diced chickpeas for vegetarian meal prep .
Looking for gluten-free cooking tips? try swapping out traditional rice for quinoa or even wild rice for something unique! with all these rice pilaf variations , you can keep things fresh and exciting.
Complete Nutrition Guide
A little healthy dose of knowledge! this healthy pilaf recipe is perfect for the health-conscious cook. each serving is packed with nutrients and comes in at around 180 calories .
With 4 grams of protein, it fits well into a balanced diet. plus, it's high in fiber, especially if you use whole grain pilaf options.
And let’s chat about portion sizes—it serves about 4-6 people , making it a great choice for gatherings. just keep in mind your guests' dietary needs, it's truly the gluten-free side dish of dream meals.
Expert FAQ Solutions
Got questions? i’ve got answers! yes, rice pilaf is gluten free , making it a fantastic option for those avoiding gluten.
If your rice seems mushy, you may have added too much liquid. keep cooking until the excess evaporates!
Don't forget, cooking is an adventure! Experiment with flavors, spices, and veggies until you find what speaks to you.
Conclusion
So, there you have it! your ultimate guide to making the best gluten-free rice pilaf that’s not only easy and delicious but also super versatile.
Make it your own, inject your personality into every bite, and remember, cooking is about joy, exploration, and sharing good food with those you love.
Happy cooking!
Ethereal Gluten-Free Rice Pilaf Card
⚖️ Ingredients:
- 1 cup (190g) long-grain white rice or basmati rice
- 2 cups (480ml) gluten-free vegetable or chicken broth
- 2 tablespoons (30ml) olive oil or unsalted butter
- 1 small onion, finely chopped
- 2 cloves garlic, minced
- 1 medium carrot, diced
- 1/2 cup (75g) frozen peas (optional)
- 1 teaspoon salt (adjust to taste)
- 1/2 teaspoon black pepper
- 1/2 teaspoon ground cumin (optional)
- 1/2 teaspoon turmeric (for color)
- Fresh parsley, chopped (for garnish)
🥄 Instructions:
- Step 1: Gather and measure all ingredients.
- Step 2: Heat olive oil or butter in a saucepan over medium heat.
- Step 3: Add chopped onion; sauté until translucent (3-4 minutes).
- Step 4: Stir in minced garlic and diced carrot; cook for an additional 2-3 minutes.
- Step 5: Add the rice to the pan; stir to coat with oil and sauté for about 1 minute.
- Step 6: Add salt, pepper, cumin, and turmeric; mix well.
- Step 7: Pour in the broth; increase heat and bring to a boil.
- Step 8: Once boiling, reduce heat to low and cover; cook for 15-18 minutes until rice is tender and liquid is absorbed.
- Step 9: Remove from heat; let it sit covered for 5 minutes.
- Step 10: Fluff the rice with a fork and stir in frozen peas if using.
- Step 11: Serve warm, topped with chopped parsley.
Previous Recipe: How to Make Delicious Gluten Free Pita Chips: My Kitchen-Tested Recipe
Next Recipe: Delicious Sugar-Free Vanilla Cupcakes: 5 Ways to Enjoy Pillsbury Creamy Supreme Frosting!