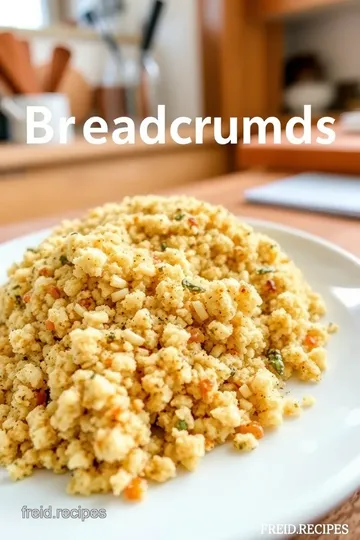
Savory Shar Gluten Free Breadcrumbs
Looking for shar gluten free breadcrumbs? Discover how to make easy, crispy, savory breadcrumbs that enhance your favorite gluten-free meals. Try it today!

- Secrets Behind Perfect Savory Shar Gluten Free Breadcrumbs
- What Makes This Recipe Special
- Health and Nutrition Highlights
- Recipe at a Glance
- Perfect Ingredients Selection
- Kitchen Equipment Essentials
- Savory Shar Gluten Free Breadcrumbs: A Game-Changer for Your Meals
- Professional Secrets
- Perfect Presentation
- Storage and Make-Ahead
- Creative Variations
- Complete Nutrition Guide
- Expert FAQ Solutions
- Recipe Card
Have you ever thought about how something as simple as breadcrumbs can transform a dish from ordinary to extraordinary? seriously, it’s wild how these little nuggets can bring so much flavor and texture into your meals! ahh, breadcrumbs.
.. they might seem insignificant, but for those of us navigating the world of gluten-free cooking , having a solid recipe for savory shar gluten free breadcrumbs is a game changer.
This recipe is special because it merges crispy goodness with aromatic herbs and spices, all while keeping it gluten-free. trust me, it’ll take you just about 25 minutes from start to finish.
And as for difficulty? pfft, if you can use a toaster, you can handle this like a pro!
Let’s take a quick stroll through history, shall we? breadcrumbs have been a kitchen staple for centuries. they trace back to ancient civilizations, where thrifty cooks used leftover bread to stretch meals.
That frugality remains a hallmark of this wonderful ingredient, but now we can do so much more with it! in truth, the use of breadcrumbs has only grown in the culinary world, especially in recent times as dietary needs have changed.
What sets this savory shar gluten free breadcrumbs recipe apart? it’s not just about being gluten-free; it’s about flavor, versatility, and convenience.
These breadcrumbs can enhance anything from classic chicken parmesan to veggie casseroles, and they’re honestly just bursting with savory goodness.
You’ll find they deliver not just crunch but also a rich depth of flavor that will have your family and friends raving!
Secrets Behind Perfect Savory Shar Gluten Free Breadcrumbs
The beauty of breadcrumbs lies in their rich culinary heritage . did you know that seasoned breadcrumbs were once used in medieval kitchens to thicken sauces and soups? it’s true! this origin story emphasizes how cooking with herbs and spices has come a long way.
Today, these breadcrumbs have found popularity in many households, becoming a staple for anyone looking to add a delightful crunch to their dishes.
Plus, because they’re gluten-free, they are perfect in a world where everyone’s looking for tasty alternatives.
What Makes This Recipe Special
Now, let’s talk flavors! what makes these breadcrumbs really shine is the combination of garlic powder recipes and herb seasoning blends .
You don't have to worry about complicated techniques either—this is a foolproof method that even kitchen beginners can master. my favorite part? you can easily customize them! feeling adventurous? go ahead and toss in some nutritional yeast for a cheesy bite, or sprinkle on some herbs that you have hanging out in your pantry.
The options are endless!
And here's a tip from me to you: batch cooking ideas can save you time in the long run. make a large portion and store it; just think about those lazy nights when you want dinner on the table without much fuss.
Health and Nutrition Highlights
Now, i can hear some of you thinking, “okay, but what about the health bit?” good question! these breadcrumbs are made from gluten-free bread , so they cater to dietary restrictions without sacrificing taste.
Plus, by making your own using homemade breadcrumbs and choosing quality ingredients, you’re in control of what’s going into your body.
Nutritionally speaking, you’ll still get a decent amount of protein and fiber from the gluten-free bread and whatever delicious herbs you throw in.
So while these crispy bits are definitely a treat, they can fit into a balanced diet just fine!
Recipe at a Glance
Let’s break this down so you know what to expect:
- Total Preparation Time: 25 minutes (10 min prep, 15 min cook)
- Skill Level Required: Easy, no chef hat needed!
- Serving Size Details: Yields about 2 cups—enough for several delicious meals.
- Cost Efficiency: Very budget-friendly, especially if you use stale bread!
Alright, now that we've set the stage, let’s dive into the delicious world of flavors and textures with our ingredients.
Just imagine those warm, crispy breadcrumbs topping off your next casserole or salad. yum!
So, let’s get to the fun part—gathering our ingredients! I can already picture the delightful crunch they’re going to add to your meals. Happy cooking!
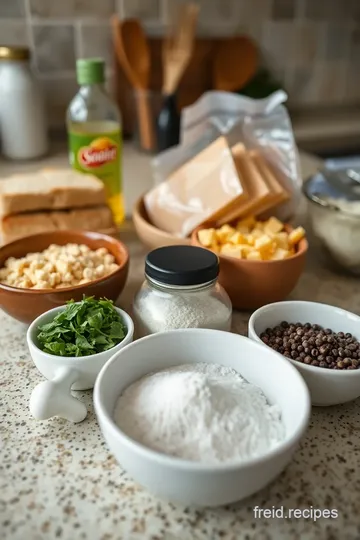
Perfect Ingredients Selection
Alright, my friend! let’s dive into what really makes a dish sparkle— the ingredients ! nothing beats the beauty of a well-stocked kitchen, where your core essentials are gleaming like treasures waiting to be transformed into mouthwatering meals.
So, kick back, grab a cuppa, and let’s chat about ingredients that’ll jazz up your cooking, especially when we’re whipping up some savory shar gluten free breadcrumbs !
Premium Core Ingredients
When setting out to gather those premium core ingredients , think of quality over quantity. For our Savory Shar Gluten Free Breadcrumbs , you need a handful of staples.
-
Detailed Measurements: For this recipe, you’ll want 4 slices of gluten-free bread, about 280g, plus other goodies like olive oil and seasonings.
-
Quality Indicators: Look for bread labeled gluten-free that has a good texture. When you pick it up, it should feel fresh—none of that crumbling or stale stuff, please!
-
Selection Tips: Local bakeries often have fabulous options, or you could hit up the gluten-free section at your grocery store. Check expiry dates; freshness matters!
-
Storage Guidance: Store your gluten-free bread in the freezer if you’re not using it right away. This way, it’ll stay fresh and ready for breadcrumb time.
Signature Seasoning Blend
Now, the magic of signature seasoning blends truly elevates your dishes. It's like dressing up for a night out—adds that flair!
-
Spice combinations: for our breadcrumbs, you can’t go wrong with a sprinkle of garlic powder, dried oregano, salt, and black pepper.
Oh my gosh, that flavor combo is unbeatable! want to make it extra special? toss in a tablespoon of nutritional yeast for a cheesy kick.
-
Herb Selections: Don’t hold back! Depending on your mood, fresh or dried herbs like parsley can add a lovely brightness.
-
Flavor Enhancers: Shake things up with some chili flakes if you're into a bit of spice.
-
Aromatic Additions: I often drop in a touch of onion powder—it adds this delightful depth without overwhelming the dish.
Smart Substitutions
Oh, life can throw curveballs, right? This is where smart substitutions can save the day!
-
Alternative Options: If you find yourself without gluten-free bread, rice cakes or gluten-free crackers can step in as solid bread substitute options.
-
Dietary Swaps: For those who can't handle oil, you can use applesauce for moisture—just make sure to balance out the flavors a bit.
-
Emergency Replacements: If you’re out of garlic powder, feel free to grab some fresh minced garlic—just use about two cloves instead.
-
Seasonal Variations: As seasons change, so could your herbs! Fresh basil in summer or thyme in the fall can really switch it up beautifully.
Kitchen Equipment Essentials
Let’s not forget the kitchen equipment essentials that make cooking a breeze!
-
Must-Have Tools: A food processor or a good ol' blender is essential for grinding up that beautiful gluten-free bread into crispy breadcrumbs.
-
Recommended Appliances: An oven is non-negotiable here. Preheating it makes all the difference!
-
Helpful Gadgets: I’m seriously a fan of silicone baking mats. They keep things nice and non-stick when you’re baking your breadcrumbs.
-
Home alternatives: if you don’t have a food processor, no worries! just pop the bread in a zip-top bag and crush it with a rolling pin.
Fun workout and deliciousness in one go!
Pro Ingredient Tips
Before we wrap up this ingredient saga, here are a few pro ingredient tips to keep in mind!
-
Selection Secrets: Look for gluten-free bread with a higher fiber content—better for your belly!
-
Quality Markers: If your bread is soft and smells fresh, you’re on the right track.
-
Storage Solutions: Making your homemade breadcrumbs? Store them in an airtight container, and they’ll stay crispy for up to two weeks.
-
Money-Saving Tips: Buy gluten-free bread in bulk if you can! Often, buying larger quantities can save you some dough.
With these Savory Shar Gluten Free Breadcrumbs , you can elevate your cooking game brilliantly with ingredients that sing! Now that we’ve set the stage with your perfect ingredients , let’s roll right into the next exciting part—the instructions! Trust me, you’ll be amazed by how easy this is!
Savory Shar Gluten Free Breadcrumbs: A Game-Changer for Your Meals
Hey there, my friend! so, one day i was rummaging through my pantry, and i realized i just had to level up my gluten-free cooking game.
Like, i’m talking serious magic in the kitchen. that’s when i came across this genius idea for savory shar gluten free breadcrumbs .
Honestly, they are a total game changer for everything from chicken parmesan to veggie casseroles.
Now, don’t even think that making your own breadcrumbs is complicated. It’s super easy! Let’s dive into the expert cooking method, shall we?
Essential Preparation Steps
First things first, let’s talk about mise en place . it’s one of those fancy french terms that we all love to use, but trust me, it makes life easier.
For this recipe, you’ll need four slices of gluten-free bread , olive oil , and those tasty spices like garlic powder and oregano .
Don’t forget your salt and pepper .
Tip: Stale bread works wonders for breadcrumbs! If you have some kicking around, now's the time to use it. It gives that perfect texture that makes these breadcrumbs super crispy!
Now, in terms of time management, give yourself about 10 minutes for prep . tear your gluten-free bread into 1-2 inch pieces, so it's ready to mingle with the spices.
Set your timer!
Professional Cooking Method
Alright, let’s get into the nitty-gritty of this delicious mix!
-
Preheat your oven to 350°F (175°C). Get it nice and toasty.
-
Combine all the ingredients in a bowl. so, toss those torn bread pieces in with a tablespoon of olive oil, a teaspoon of garlic powder, and other herbs.
If you’ve got nutritional yeast , toss that in too—it gives that cheesy vibe! i’ll tell you, the smell alone is divine!
-
Now, here’s where the fun begins. Process the mixture in a food processor. It’s about 15-20 quick pulses until you hit that perfect crumb texture. You want those crispy bites!
-
Spread the mixture on a baking sheet. Try to keep everything evenly spread out for even cooking.
-
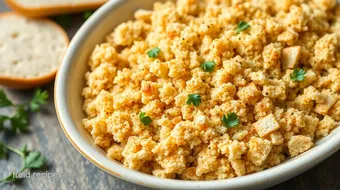
Bake for 10-15 minutes , stirring halfway through. Watch it closely because no one likes burnt breadcrumbs. You’re looking for that golden-brown look that says “I’m done and ready to crunch!”
-
Once baked, let them cool, and they’ll last in an airtight container for up to 2 weeks . You could practically stock your pantry with these! But honestly, they won’t last long.
Expert Techniques
Time for some pro tips!
-
For the absolute best results , make sure your oven is precisely preheated. You don’t want unexpected surprises in your crumb game.
-
Keep your eyes peeled while they bake; breadcrumbs go from perfect to burnt faster than you can say “Hearty Casserole.”
-
To ensure crispiness, let them cool completely before you store them. This is key to preventing moisture from turning your dream breadcrumbs into sad, soggy bits.
Success Strategies
If you hit a snag while cooking, no worries! just adjust as you go. do they seem a little soft? pop them back in the oven for a few extra minutes.
Not crunchy enough? a sprinkle of salt or some dried herbs can boost the flavor instantly.
And let’s chat about quality assurance for just a sec. use good-quality gluten-free bread, and if you’re considering a bread substitute option like rice cakes? go for it! the flavor won’t be the same, but you can still create something tasty if you adjust the spices appropriately.
When you're done, these savory shar gluten free breadcrumbs will serve as the perfect topping for any dish. now, how can you use them? maybe sprinkled over a hearty casserole or added crunch on top of your favorite baked veggie dish.
Seriously, you can’t mess this up!
Ready for some delicious variations or will you stick to the classic? Whatever you choose, just know that these are as easy as they are flavorful.
As we move onto the next section, let’s explore some creative serving ideas and maybe chat about storing those homemade breadcrumbs so they stay fresh! Trust me; your kitchen will thank you when you’ve got these tasty bites at the ready!
Professional Secrets
You know, cooking can feel a bit like art sometimes. it’s all about finding the right brush, or in our case, the right technique.
When it comes to making savory shar gluten free breadcrumbs , i've got a couple of professional secrets up my sleeve that might just make your life easier!
Professional insights: first off, using stale gluten-free bread is key. it sounds odd, but stale bread is like a canvas waiting for flavor to be painted on.
You'll get a crunchier texture, and that’s a game-changer .
Expert techniques: when you're tossing ingredients together, aim for even coverage. it might seem trivial, but making sure every little breadcrumb is coated in that zesty olive oil and aromatic garlic powder is what brings out the oohs and aahs at the dinner table.
Kitchen wisdom: ever heard the phrase, “don’t overmix”? it applies here too! over-pulsing in your food processor can lead to dust , not breadcrumbs.
Just pulse it enough until you've got a great texture; think “coarse sand” rather than "flour."
Success guarantees: If you follow these tips, I can practically guarantee your breadcrumbs will turn out crispy and flavorful. Trust me; you’ll wonder why you ever bought the pre-packaged stuff!
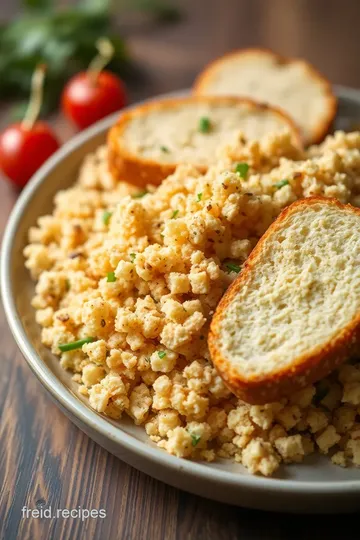
Perfect Presentation
Let’s be honest; eating is just as much about the look as it is about the taste . you could have the best gluten-free recipes in the world, but if they’re not presented well, you might hear crickets at the table.
Plating techniques: Serve your Savory Shar Gluten Free Breadcrumbs over a vibrant green salad or a majestic chicken parmesan. The colors will speak volumes.
Garnish ideas: Try sprinkling some fresh parsley or a few nutritional yeast flakes for that pop!
Serving suggestions: A little scoop in a small bowl alongside your dish invites people to dig in.
Visual appeal tips: Oh, and don’t forget about texture. Layer up those breadcrumbs to show off their golden crunch —it invites every fork to dive in.
Storage and Make-Ahead
Once you whip up a batch of these beauties, you’re going to want to keep them fresh.
Storage guidelines: Make sure they cool completely before stashing them in an airtight container . This keeps them lovely and crunchy.
Preservation methods: You can store these savory breadcrumbs for about two weeks, but let’s be real—you’ll probably finish them way before that!
Reheating instructions: If you somehow have leftovers, pop them back in the oven at a low temperature to revive the crunch. Just a few minutes will do wonders.
Freshness tips: Want a long-term solution? You can freeze them in small batches! Just store them in freezer bags and pull out what you need, when you need it.
Creative Variations
Cooking is about freedom, right? So why not explore and innovate with your recipe variations ?
Flavor adaptations: Want more heat? Toss in some crushed red pepper flakes or cayenne pepper into your breadcrumb mix.
Dietary modifications: If you’re vegan, swap the nutritional yeast for a sprinkle of Italian breadcrumbs for that cheesy flair without the dairy.
Seasonal twists: In the fall, try adding some pumpkin spice for a sweet-savory combo. Trust me, your taste buds will adore it!
Regional variations: Add herb seasoning blends to mimic classic flavors from around the world. Think Mediterranean with rosemary or Italian with basil; it’s like taking a culinary trip without leaving your kitchen!
Complete Nutrition Guide
Okay, let’s talk numbers. Cooking healthy doesn’t mean sacrificing flavor —that's my motto!
Detailed breakdown: A serving of these Savory Shar Gluten Free Breadcrumbs packs around 170 calories. Not too shabby, right?
Health benefits: The nutritional yeast provides a nice dose of B vitamins, plus it adds flavor.
Dietary information: Remember, we’re keeping it gluten-free, so everyone can enjoy!
Portion guidance: Stick to about 1/3 cup as a topping, which gives you that satisfying crunch without overdoing it.
Expert FAQ Solutions
Sometimes, you’ll have burning questions, and I’m here to quench that!
Common concerns: A lot of folks worry about bread being dry. Trust me—stale bread isn't sad bread, it's just waiting for transformation.
Expert answers: You can experiment with garlic powder recipes by also adding in onion powder if you like a sharper bite.
Troubleshooting guide: If your breadcrumbs aren’t crisping up properly, check your oven temperature. Sometimes it can be sneaky!
Success tips: Keep a little notebook in your kitchen for ideas or modifications. You'll thank future you for the great memories and flavors!
Cooking is an adventure, my friend, and these Savory Shar Gluten Free Breadcrumbs are the perfect sidekick. You can use them in so many meals—casserole toppings, baked chicken, or just straight-up snacking!
So why not give it a whirl? Your taste buds will thank you, and your friends will be begging for your secrets . Happy cooking!
Savory Shar Gluten Free Breadcrumbs Card
⚖️ Ingredients:
- 4 slices gluten-free bread (approximately 280g)
- 1 tablespoon olive oil (15ml)
- 1 teaspoon garlic powder (5g)
- 1 teaspoon dried oregano (1g)
- 1/2 teaspoon salt (3g)
- 1/4 teaspoon black pepper (1g)
- 1 tablespoon nutritional yeast (optional, 5g)
- 1 teaspoon dried parsley (optional, 1g)
🥄 Instructions:
- Step 1: Preheat the oven to 350°F (175°C).
- Step 2: Tear the gluten-free bread into smaller pieces (about 1-2 inches).
- Step 3: In a mixing bowl, combine the torn bread, olive oil, garlic powder, oregano, salt, and black pepper. (Add nutritional yeast and parsley if using).
- Step 4: In batches, pulse the bread mixture in a food processor until it reaches a coarse crumb texture (approximately 15-20 pulses).
- Step 5: Evenly spread the breadcrumb mixture on a baking sheet.
- Step 6: Bake in the preheated oven for 10-15 minutes, stirring halfway through, until breadcrumbs are golden brown and crispy.
- Step 7: Remove from the oven and let cool. Store in an airtight container for up to 2 weeks.
Previous Recipe: Free Printable Pumpkin Pie Slices Template for Preschoolers: 5 Fun Craft Ideas!
Next Recipe: Sugar Free Caramel Pecan Syrup Free Shipping: 5 Easy Ways to Elevate Your Breakfast!